Example Asbestos Removal Projects in La Mesa

Below, each project is laid out step by step, with the type of home, which materials came back positive, how they are taken out, the schedule and a rough price. Most La Mesa homes went up between the 1950s and the 1970s, so most examples are houses of that age, with a mobile home and an office building as well.

Treat them as illustrations rather than past projects; no client or address is behind any of them. What they share with real jobs is the local housing, the order of the work and current prices, which is enough to plan around before a quote.

Textured ceilings throughout a single-wide mobile home

Example project

Single-wide mobile home with metal siding, a small front porch and steps, palm trees and dry hills behind
Home
1970s single-wide in a mobile home park in La Mesa, metal siding and a small front porch
Original request
Smooth ceilings in every room before new paint and lights
Testing
Lab tests of the ceiling texture in the living room, kitchen and bedrooms found asbestos
Area
About 750 sq ft of ceiling in six rooms and a hallway
Paperwork
Park approval; no air district notice for a single mobile home
Timeline
Three to four working days after the lab results
Estimated cost
$6,800

Scope of work

Lab tests of the texture, the rooms emptied or furniture wrapped, floors and walls covered in plastic, a filtered air unit, the texture misted and scraped off room by room, sealed bags, a HEPA vacuum and wet wipe, and disposal. New ceiling finish and paint are extra.

Project overview

In this example, the owners of a 1970s single-wide in a La Mesa park want to repaint and add new lights, and every room has the same sprayed ceiling texture. Samples from three rooms all come back positive.

A single mobile home is outside the county air district rule, so no notice or fee is filed. The crew still works under state worker rules, keeping the texture wet inside sealed plastic. The park manager approves the dates and where the waste bin can stand.

The goal

The goal is bare, clean ceilings in every room, ready for new paint and lights, with no texture dust left in the home.

Process

  1. First visit Samples from three rooms go to a lab; the park rules are checked.
  2. Before work Park manager approves the dates and the bin; furniture moved or wrapped.
  3. Days one to three Room by room, plastic up, texture misted and scraped, waste bagged and sealed.
  4. Last day Final clean, plastic folded inward and bagged, rooms handed back.

Planning right

  • Ceilings in a mobile home are low and the rooms are small. Each room is sealed and finished in turn.
  • Ask the park office about work hours and where a bin may stand before booking.
  • Some older units have ceiling panels, not sprayed texture. Panels are tested on their own.
  • Keep the lab report with the title papers. A buyer may ask for it.

Get a free quoteMore about popcorn ceiling removal

Cracked stucco stripped from the front of the house for a re-stucco

Example project

Low stucco house with a flat-roofed glassy wing and a wood front door, above a garden of agaves and boulders with steps up
Home
Lemon Grove stucco house from the 1960s, one story, on a sloping lot with a dry garden
Original request
Re-stucco the cracked front wall of the main house, right of the front door
Testing
Lab test of the stucco found asbestos in the original coat
Wall
About 280 sq ft of stucco around the one wide front window
Work
Wall tented, stucco kept damp and broken out to the lath, debris bagged
Timeline
Three days on site once the results are back
Estimated cost
$5,600

Scope of work

A sample of the stucco, plastic on the ground and over the plants below, the window sealed, the wall tented on the work side, the stucco kept damp and broken out, sealed bags, a clean of the ground and the path, and disposal. New lath, stucco and paint are extra; the glass-fronted wing is not touched.

Project overview

In this example, the stucco on the front of a 1960s house in Lemon Grove, on the main house to the right of the front door, has cracked around the wide window, and the owners want that wall re-stuccoed. A sample of the original coat tests positive.

Stucco cannot come off in whole pieces like siding, so it is kept damp and broken out inside a tent of plastic. The agaves and the path below are covered, and the work stops if the wind picks up.

The goal

The goal is a bare front wall ready for new stucco, with the asbestos coat gone and the garden left clean.

Process

  1. First visit Sample of the stucco; the wall, the window and the garden below looked at.
  2. Day one Plastic laid over the ground and plants, the window sealed and the wall tented.
  3. Day two Stucco misted and broken out to the lath, bagged as it falls.
  4. Day three Last pieces out, the ground and path cleaned, the tent folded inward and bagged.

Planning right

  • The window frame stays in place. Ask the plasterer whether new trim is wanted before the wall goes back up.
  • Tell the neighbors the dates. The tent and plastic answer most questions before they come up.
  • Morning work avoids the afternoon wind on a sloping lot.
  • The plasterer can start on the bare wall as soon as the plastic is gone.

Get a free quoteMore about stucco removal

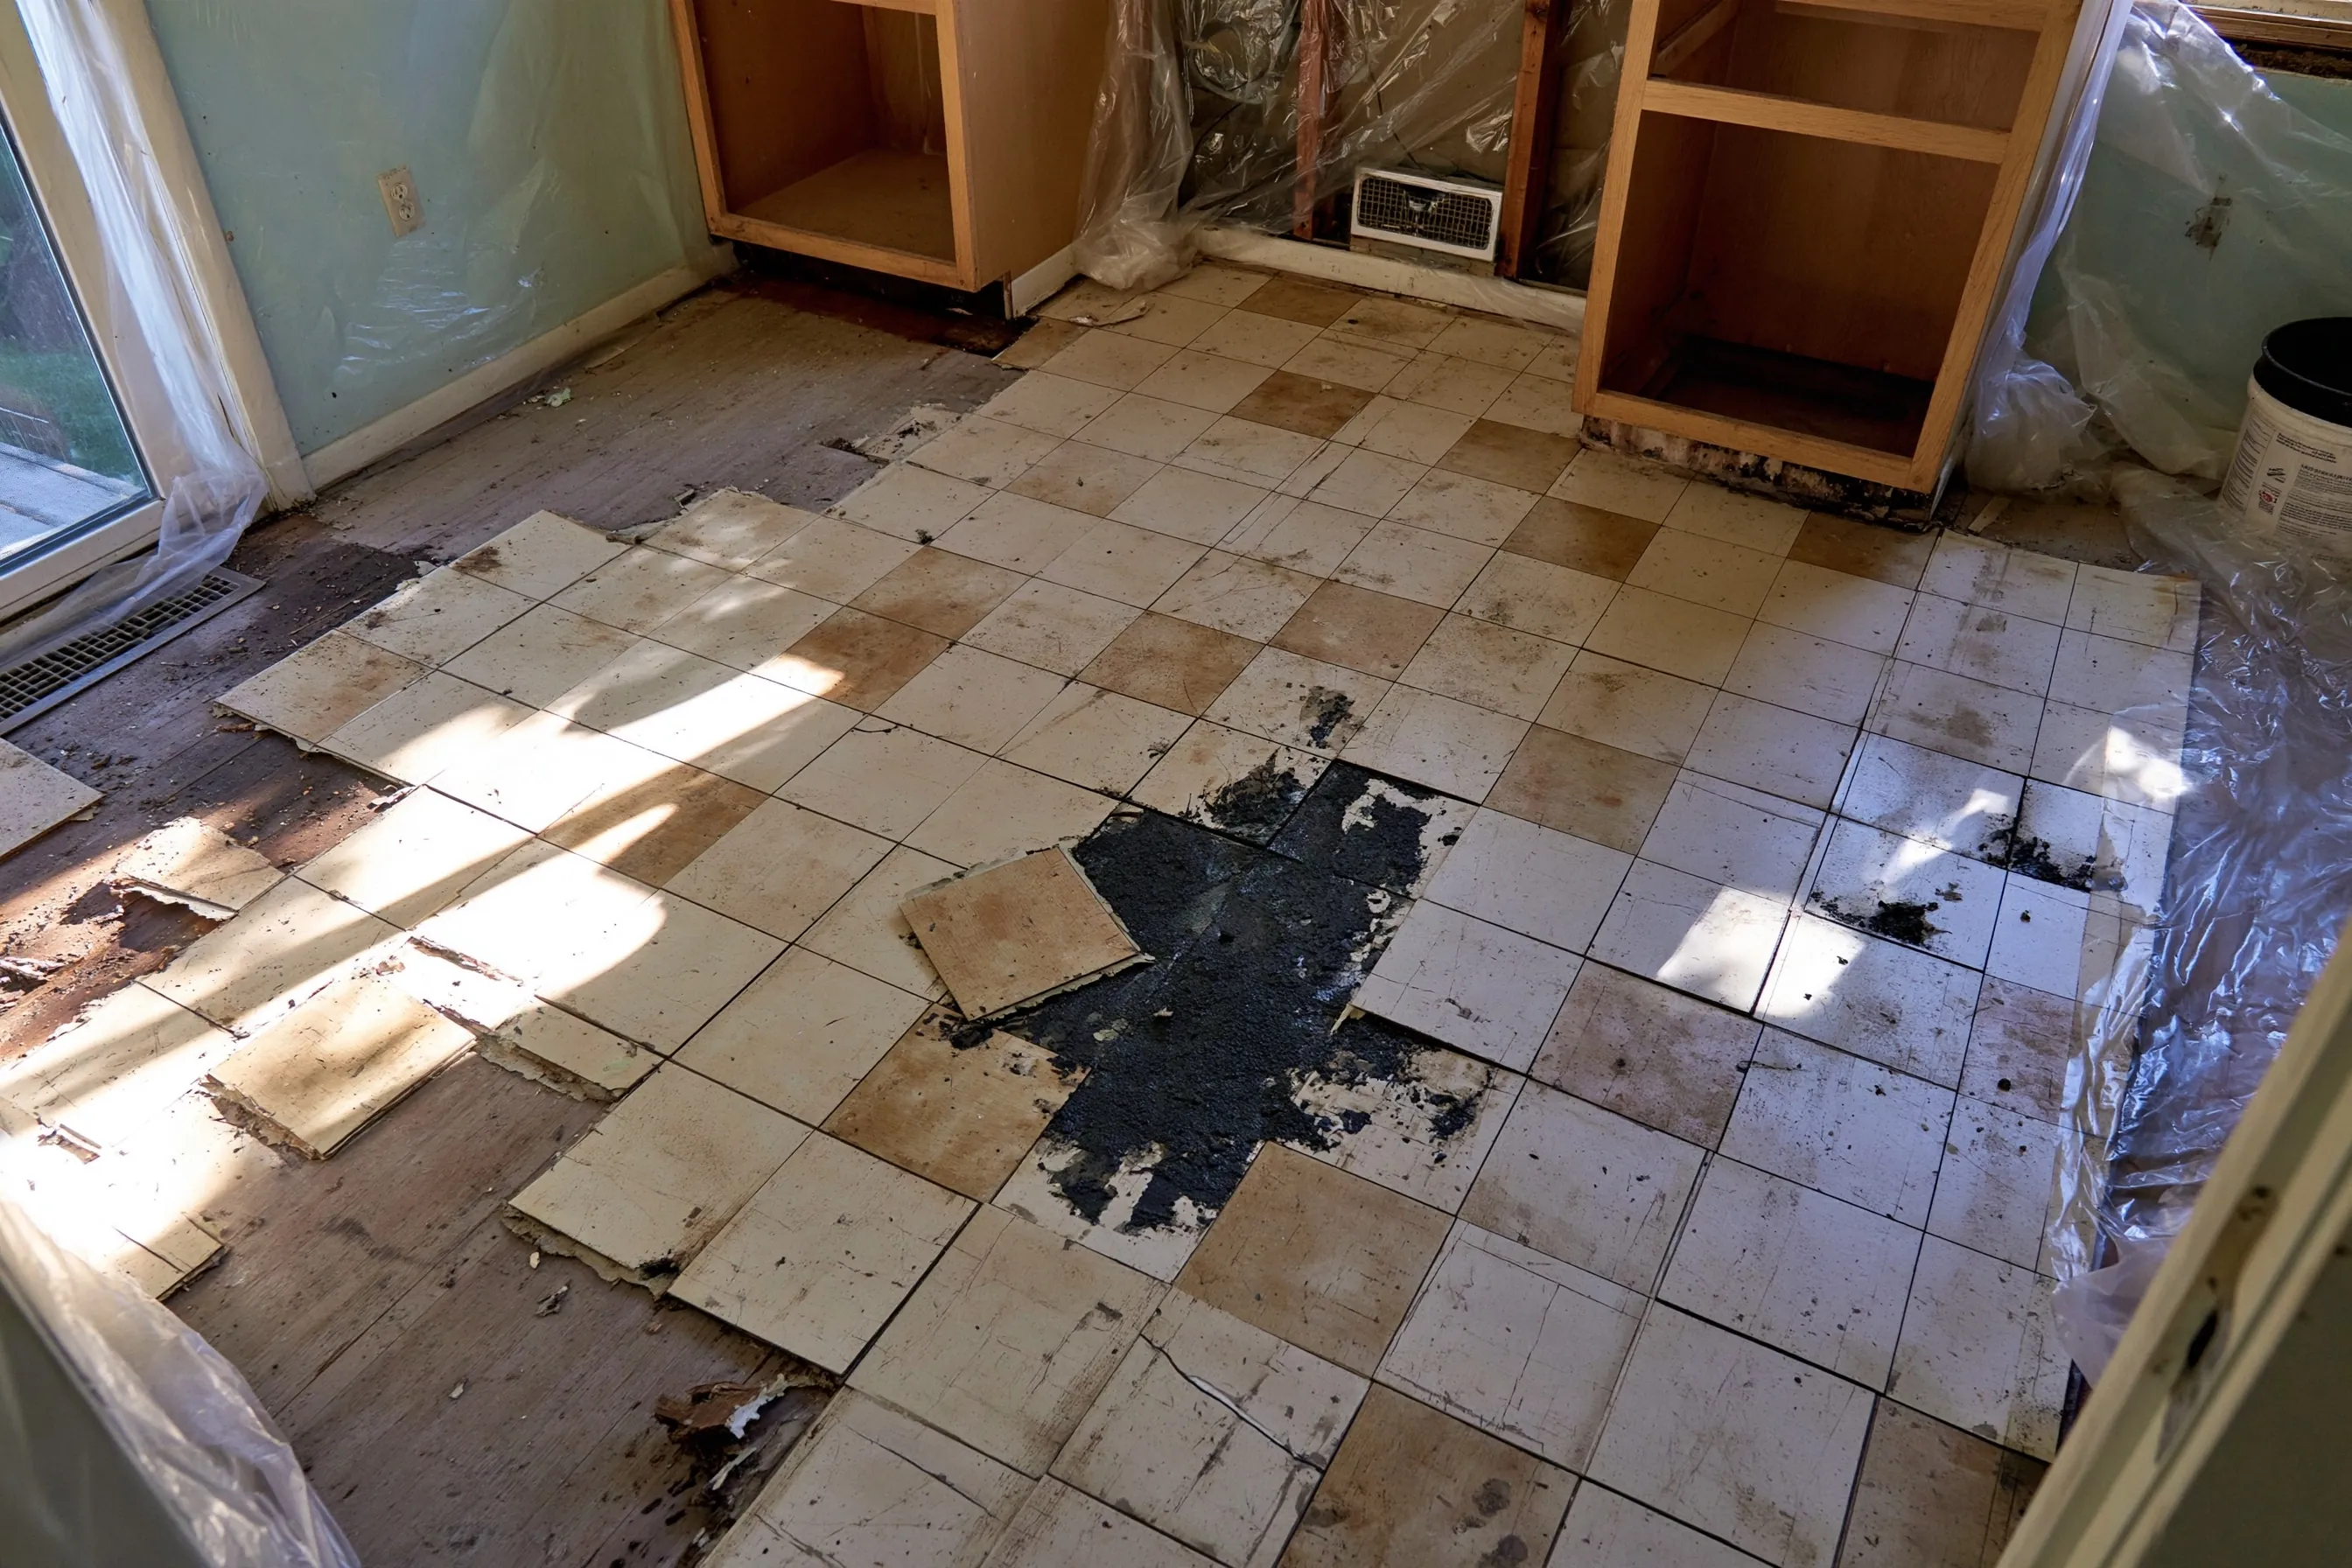
Kitchen floor tile and black adhesive during a remodel

Example project

Kitchen with the cabinets removed, cream and tan 9-inch floor tiles partly lifted over black adhesive, and a sliding glass door
Home
1960s single-story house in Santee
Original request
New cabinets and a tile floor in the kitchen
Testing
Tile and adhesive each sampled; both contain asbestos
Room
Kitchen with a sliding glass door, about 220 sq ft, cabinets already out
Work
Tile lifted whole by hand, adhesive scraped off wet down to the wood subfloor
Timeline
Two days, between cabinet removal and the new subfloor
Estimated cost
$3,900

Scope of work

Separate samples of the tile and the adhesive, plastic over the walls and doorways, the tiles lifted whole with heat and hand scrapers, the adhesive scraped off wet, sealed and labeled bags, a HEPA vacuum and disposal. The new subfloor, cabinets and tile are extra.

Project overview

In this example, the owners of a 1960s house in Santee are remodeling the kitchen. With the old cabinets out, the floor shows cream and tan 9-inch tiles over black adhesive. Lab results come back positive for the tile and, separately, for the adhesive.

The tiles come up whole, by hand, so they stay intact, and the adhesive is scraped off wet. A house is outside the county air district rule, but the crew follows state worker rules, and the remodel waits two days, not two weeks.

The goal

The goal is to keep the kitchen remodel on schedule, with the tile and adhesive gone and bare boards ready.

Process

  1. First visit Tile and adhesive sampled separately and sent off.
  2. Day one Walls and doorways covered, tiles lifted whole and bagged.
  3. Day two Adhesive scraped off wet, the floor vacuumed and checked.
  4. Then The remodeler lays the new subfloor and the tile.

Planning right

  • Test the floor before the cabinets come out, so the removal can be booked in the gap.
  • Do not grind black adhesive off a floor. It turns into fine dust.
  • Check with the tile setter on the subfloor they want before work starts.
  • Keep the sliding door closed and taped while the work is under way.

Get a free quoteMore about floor tile and mastic removal

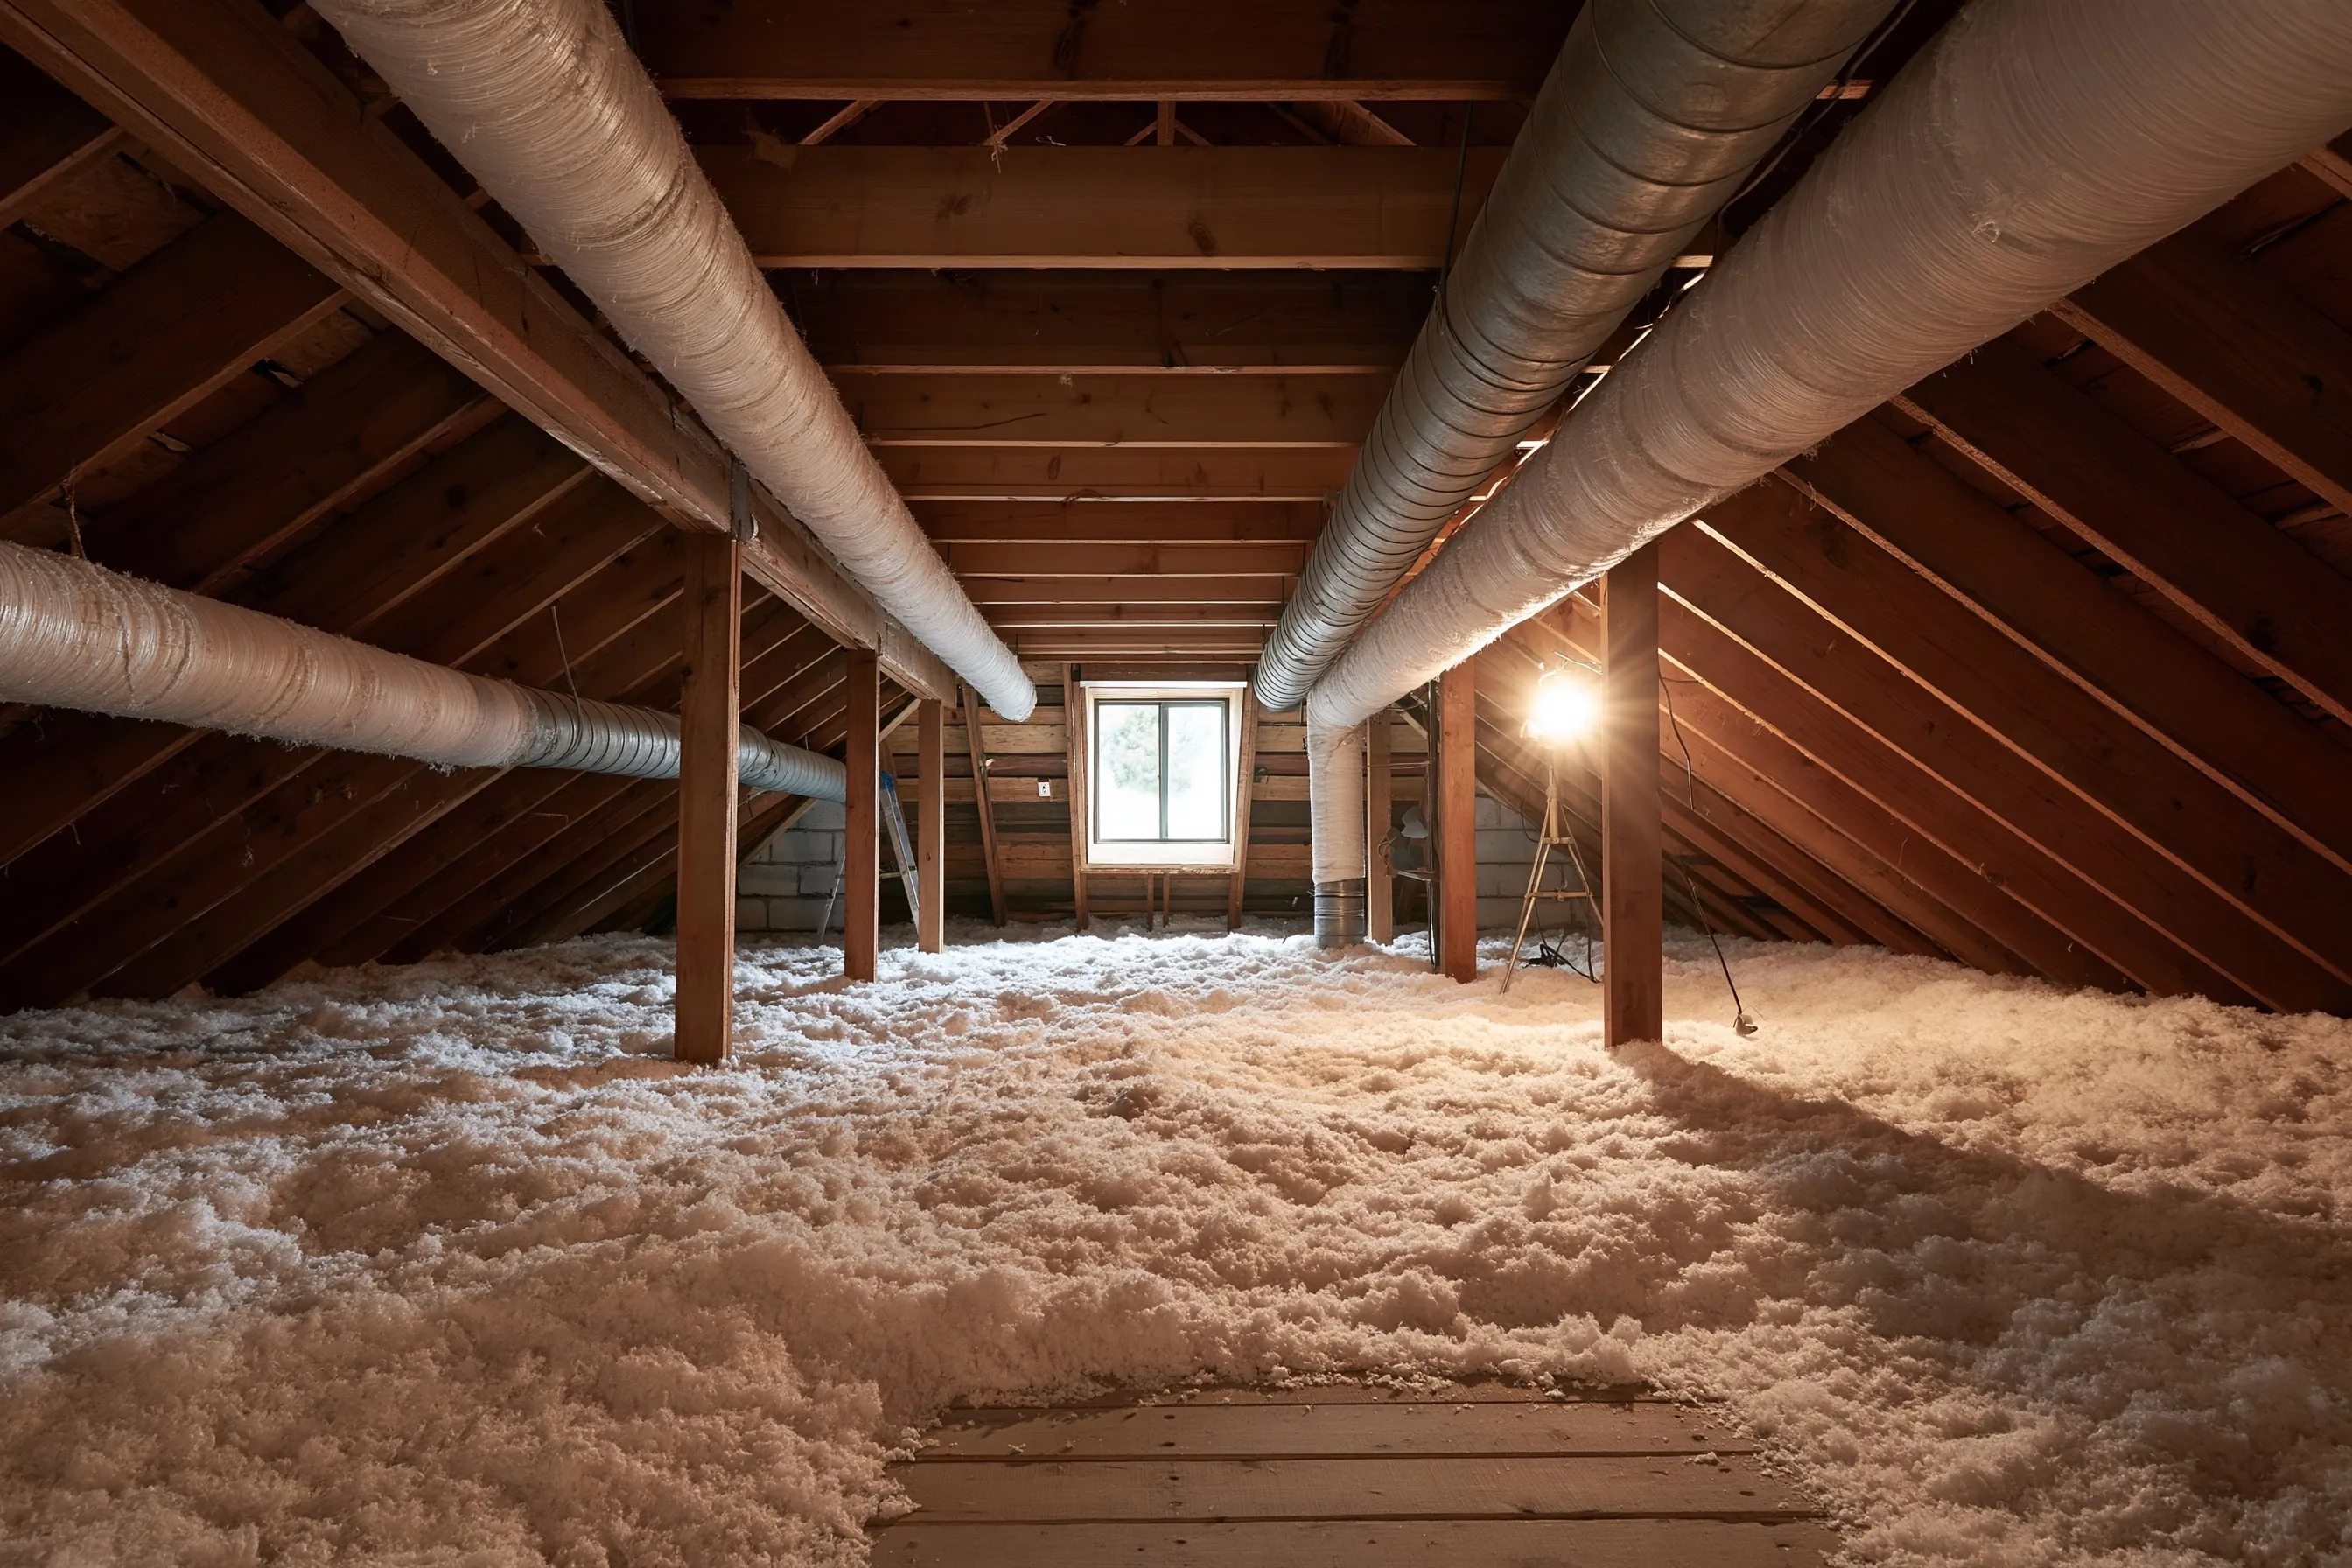
Old attic ducts out before a heat pump

Example project

Attic under a peaked wood roof with round wrapped ducts running along the rafters, loose-fill insulation, a small gable window and a work lamp
Home
La Mesa house from the 1950s, one story, about 1,300 sq ft
Original request
A heat pump and all-new ducts in the attic
Testing
Lab tests of the duct wrap, the joint tape and the loose-fill insulation
Found
Asbestos in the duct wrap and the joint tape
Clear
No asbestos in the loose-fill insulation
Work
Every old duct taken out of the attic, cut into short lengths and bagged
Timeline
Two to three days, mornings only in summer
Estimated cost
$5,200

Scope of work

Samples of the wrap, the tape and the loose fill, a sealed path from the attic hatch, the old ducts wetted, cut and bagged in the attic without stirring up the loose fill, the register boots taken out from below, a HEPA vacuum of the work area and disposal. New ducts and the heat pump are priced by the heating contractor.

Project overview

In this example, the owners of a 1950s house in La Mesa are replacing an old furnace with a heat pump and new ducts. The round ducts run along the rafters above loose-fill insulation, and the installer will pull them all out, so the wrap, the tape and the loose fill are tested first. The wrap and the tape are positive.

The old ducts come out before the installer arrives, wetted and cut into lengths that fit sealed bags, with boards laid over the joists so the loose fill stays put. Attic heat shapes the schedule, so in summer the work runs in the mornings only.

The goal

The goal is an empty attic ready for new ducts, with the old tape and wrap gone and no dust in the rooms below.

Process

  1. First visit Samples of the wrap, the tape and the loose fill go to a lab.
  2. Day one Hatch and hallway sealed, boards laid, the nearest runs removed.
  3. Days two and three Remaining runs cut and bagged in the attic, boots taken out from below, area vacuumed.
  4. Then The heating contractor installs the heat pump and the new ducts.

Planning right

  • Book the test with the heat pump quote, so removal fits before the install date.
  • Test the loose fill too. If it ever needs moving, you will already know what it is.
  • In summer, attic work runs early. Plan a few extra days.
  • New duct joints should be sealed with materials made for ducts, never cloth tape.

Get a free quoteMore about duct and insulation removal

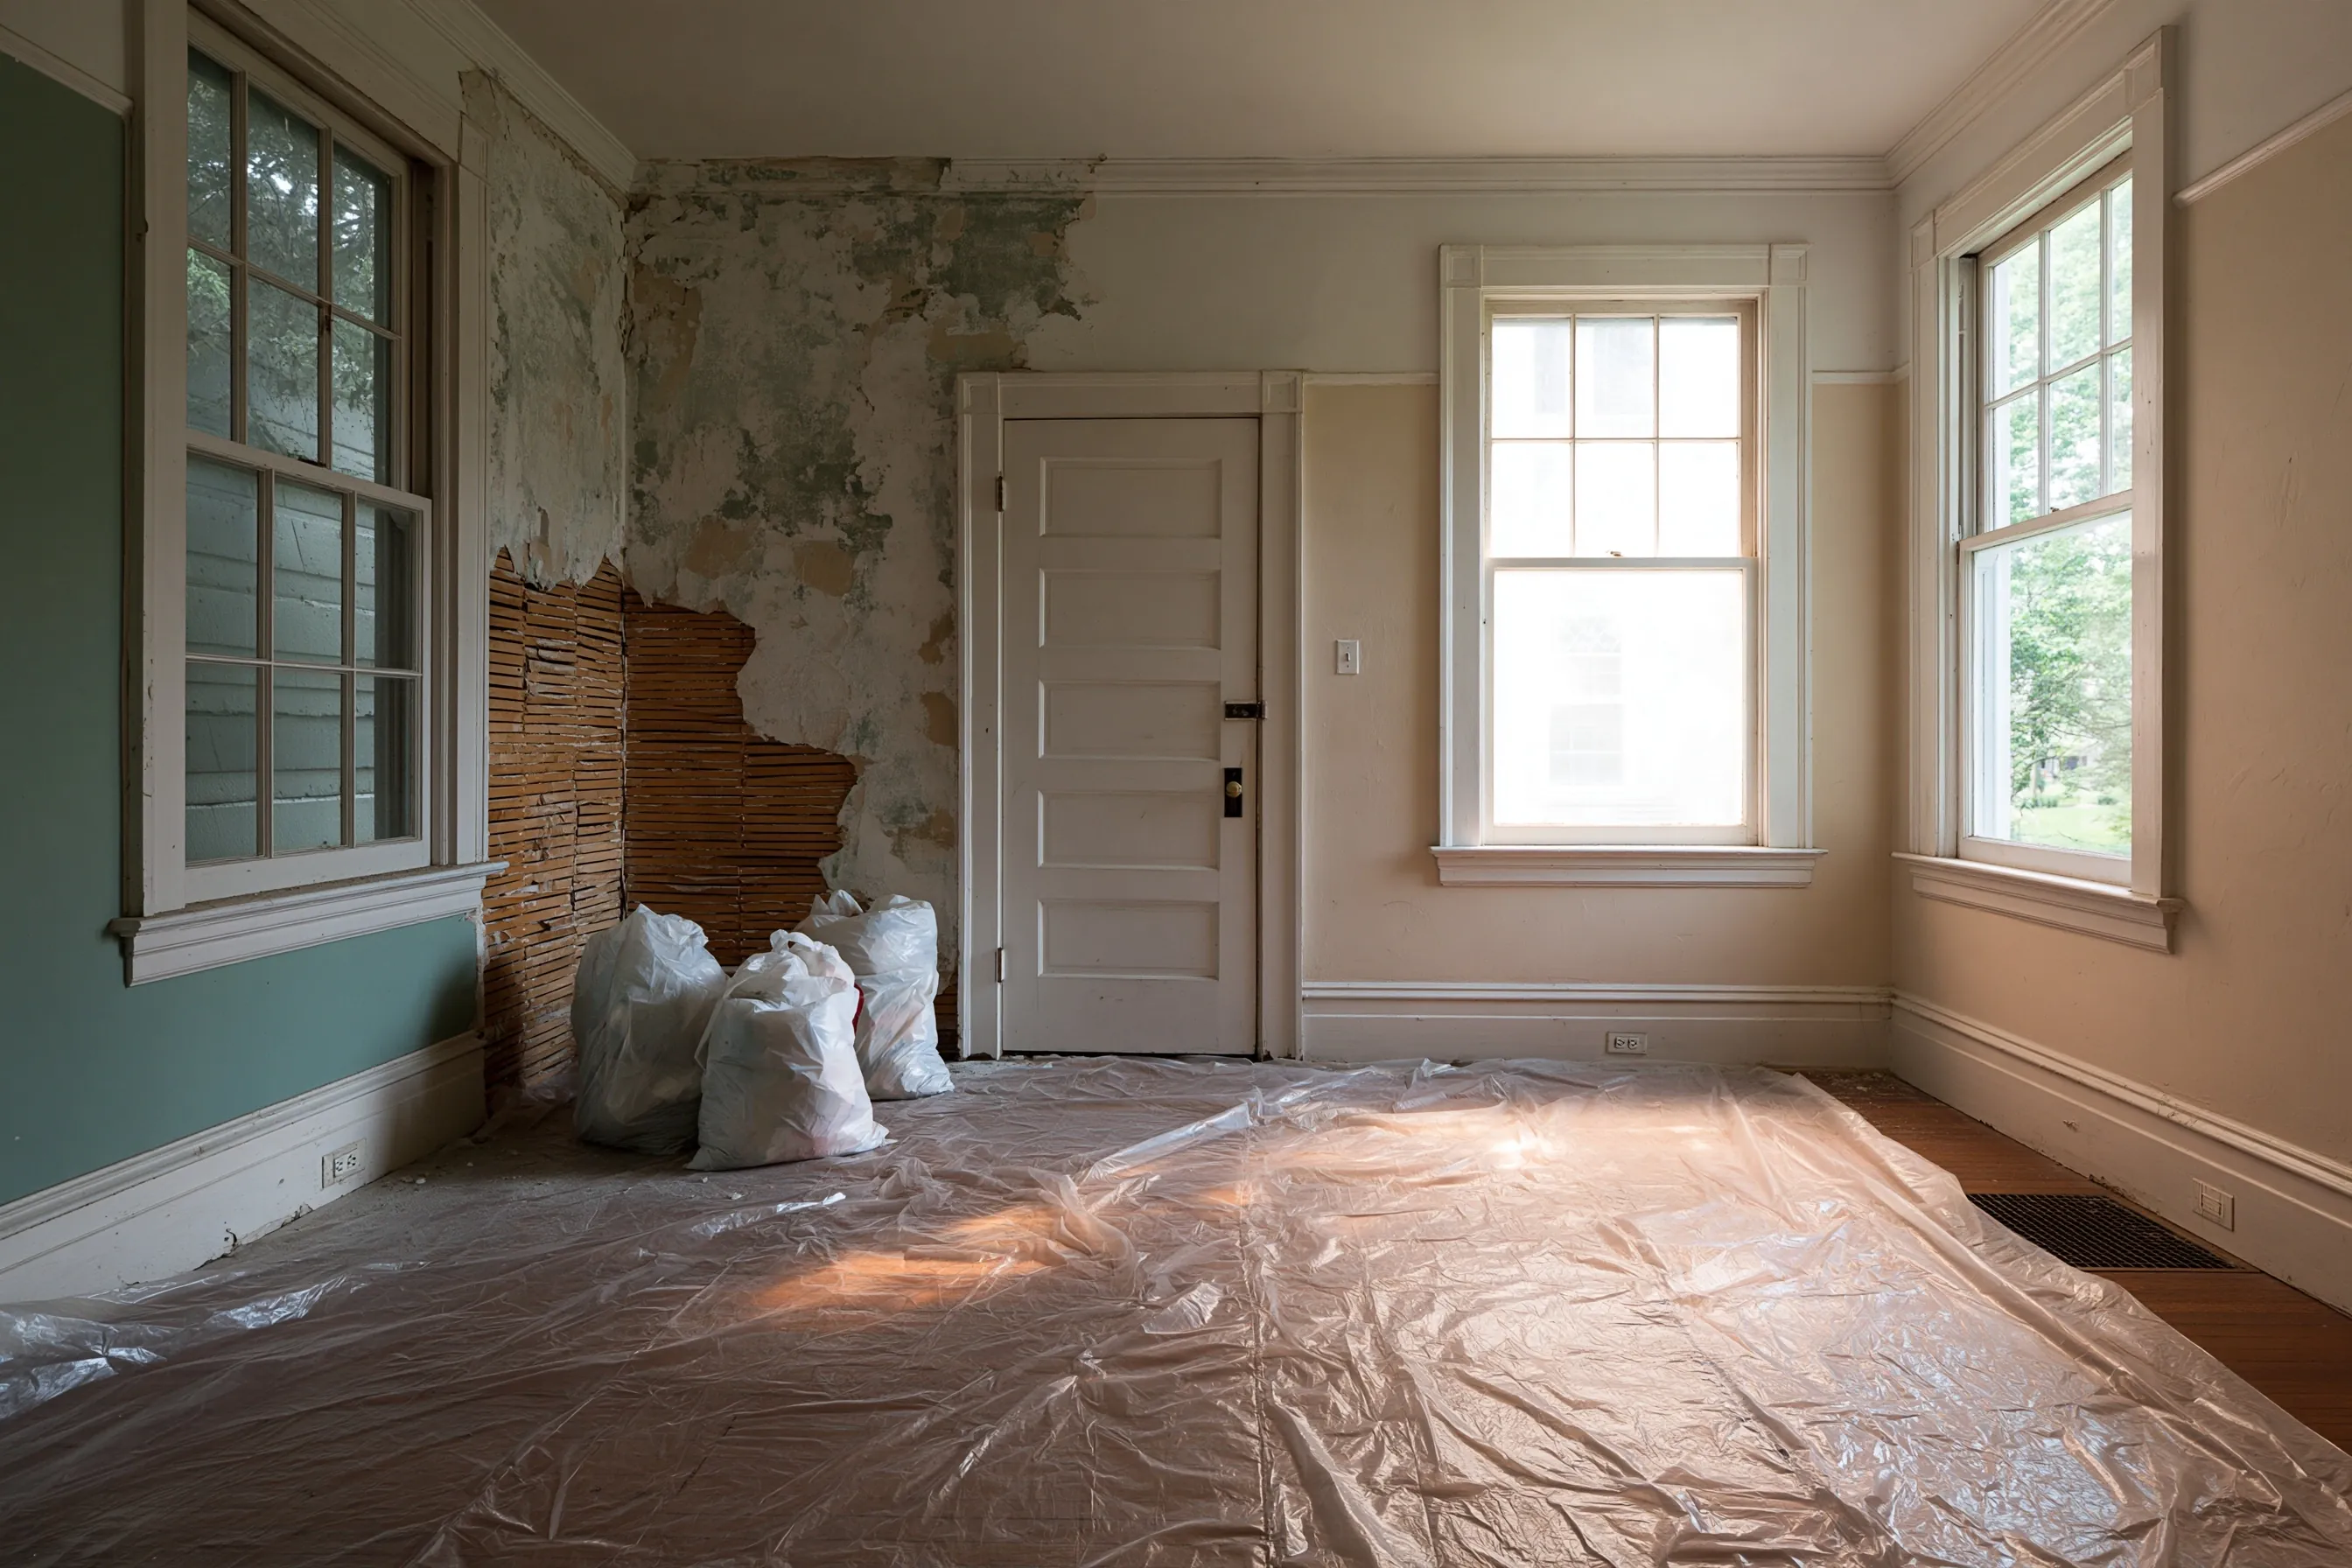
Old patch compound in a crumbling plaster corner

Example project

Bedroom with tall wood sash windows, plaster broken away to the wood lath in one corner, bags of debris and plastic over the floor
Home
1930s house in La Mesa, one of about a thousand built before 1940
Original request
Repair one corner of a bedroom where the plaster is coming loose from the lath
Testing
Separate lab tests of the original plaster and the old patching compound in the corner
Found
Asbestos in the patching compound; none in the original plaster
Area
About 80 sq ft of the corner, down to the lath
Work
The patched, loose section taken down inside plastic; the rest of the room keeps its plaster
Timeline
One day of removal, then a plaster repair by others
Estimated cost
$2,400

Scope of work

Separate samples of the plaster and the patch, plastic over the floor and a filtered air unit, the fallen pieces misted and bagged, the patched section taken down to the lath, sealed bags, a HEPA vacuum and wet wipe, and disposal. The plaster repair is extra.

Project overview

In this example, the plaster in one corner of a bedroom in a 1930s La Mesa house has let go of the lath. The corner was patched years ago with a different compound, and that patch is where it is failing.

The original plaster tests clear, but the old patching compound is positive. Only the patched corner, about 80 sq ft, comes down inside plastic, and a plasterer rebuilds it to match the rest of the room.

The goal

The goal is a sound corner ready for a plaster repair, with the asbestos patch gone and the rest of the room untouched.

Process

  1. First visit Samples of the plaster and the patch; the loose corner misted and covered.
  2. Morning Floor covered, filtered air unit started, fallen pieces bagged.
  3. Afternoon Patched section taken down to the lath, area vacuumed and wiped.
  4. Then The plasterer rebuilds the corner.

Planning right

  • Leave fallen plaster where it is and keep the door shut until it is tested.
  • Old repairs are often a different material from the wall around them.
  • The window trim stays in place during the repair.
  • Keep the lab report for any later work on the same walls.

Get a free quoteMore about drywall, joint compound and plaster removal

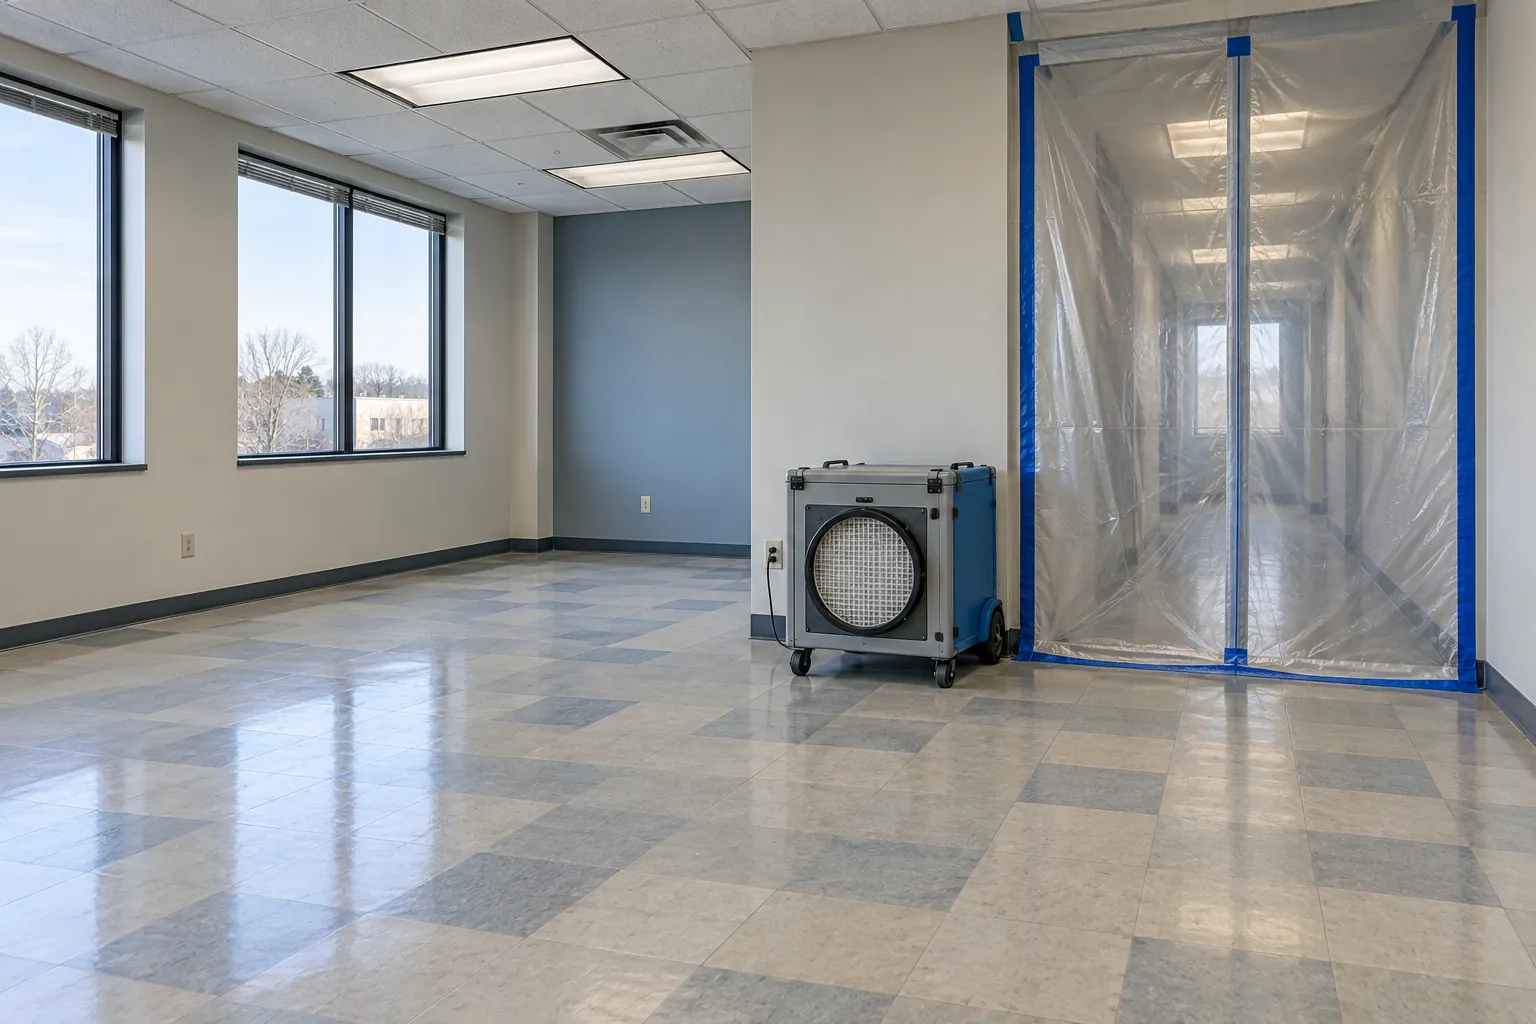
Old ceiling tiles out of an office suite before new lighting

Example project

Vacant office with gray and cream vinyl tiles, ceiling lights, a row of tall windows, an air scrubber and a plastic zip wall
Building
Office suite in a 1970s two-story office building in La Mesa
Original request
Replace the old lay-in ceiling and lights in an empty suite before it is leased again
Testing
Facility survey of the ceiling tiles, floor and walls
Found
Asbestos in the lay-in ceiling tiles; the vinyl floor tile and walls are clear
Area
About 1,100 sq ft of ceiling
Work
Ceiling tiles lowered whole and bagged behind a zipper door, with filtered air
Timeline
Two weeks for the survey and notice, then four days on site
Estimated cost
$8,800

Scope of work

Removal of the positive ceiling tiles across the suite, a zipper door to the corridor and a filtered air unit, the tiles misted, lifted out of the grid whole and bagged, a HEPA clean of the grid and the floor, waste records and a clearance check. The survey, the air district fee and the new ceiling and lights are extra.

Project overview

In this example, the owner of a 1970s office building in La Mesa wants new lights and a new ceiling in an empty suite before it is leased again. Commercial buildings fall under the county air district rule, so a facility survey comes first, then a notice at least 10 working days before work.

The survey finds asbestos in the old lay-in ceiling tiles, while the vinyl floor and the walls are clear. The tiles are misted, lifted out whole and bagged behind a zipper door, so the electrician starts under a clean, empty grid.

The goal

The goal is an empty, clean ceiling grid ready for new tiles and lights, with the suite ready to lease.

Process

  1. Weeks one and two Facility survey and lab results; the notice filed with the air district.
  2. Day one Zipper door at the corridor, filtered air unit started, floor covered.
  3. Days two and three Ceiling tiles misted, lifted out whole and bagged.
  4. Last day Grid and floor cleaned, a clearance check, the zipper door taken down.

Planning right

  • The survey has to come before the notice, whatever the building age.
  • Keep the survey on site for the whole job.
  • Lifting tiles out whole makes far less dust than breaking them down.
  • The new tenant gets a copy of the survey and the waste records.

Get a free quoteMore about apartment and commercial abatement

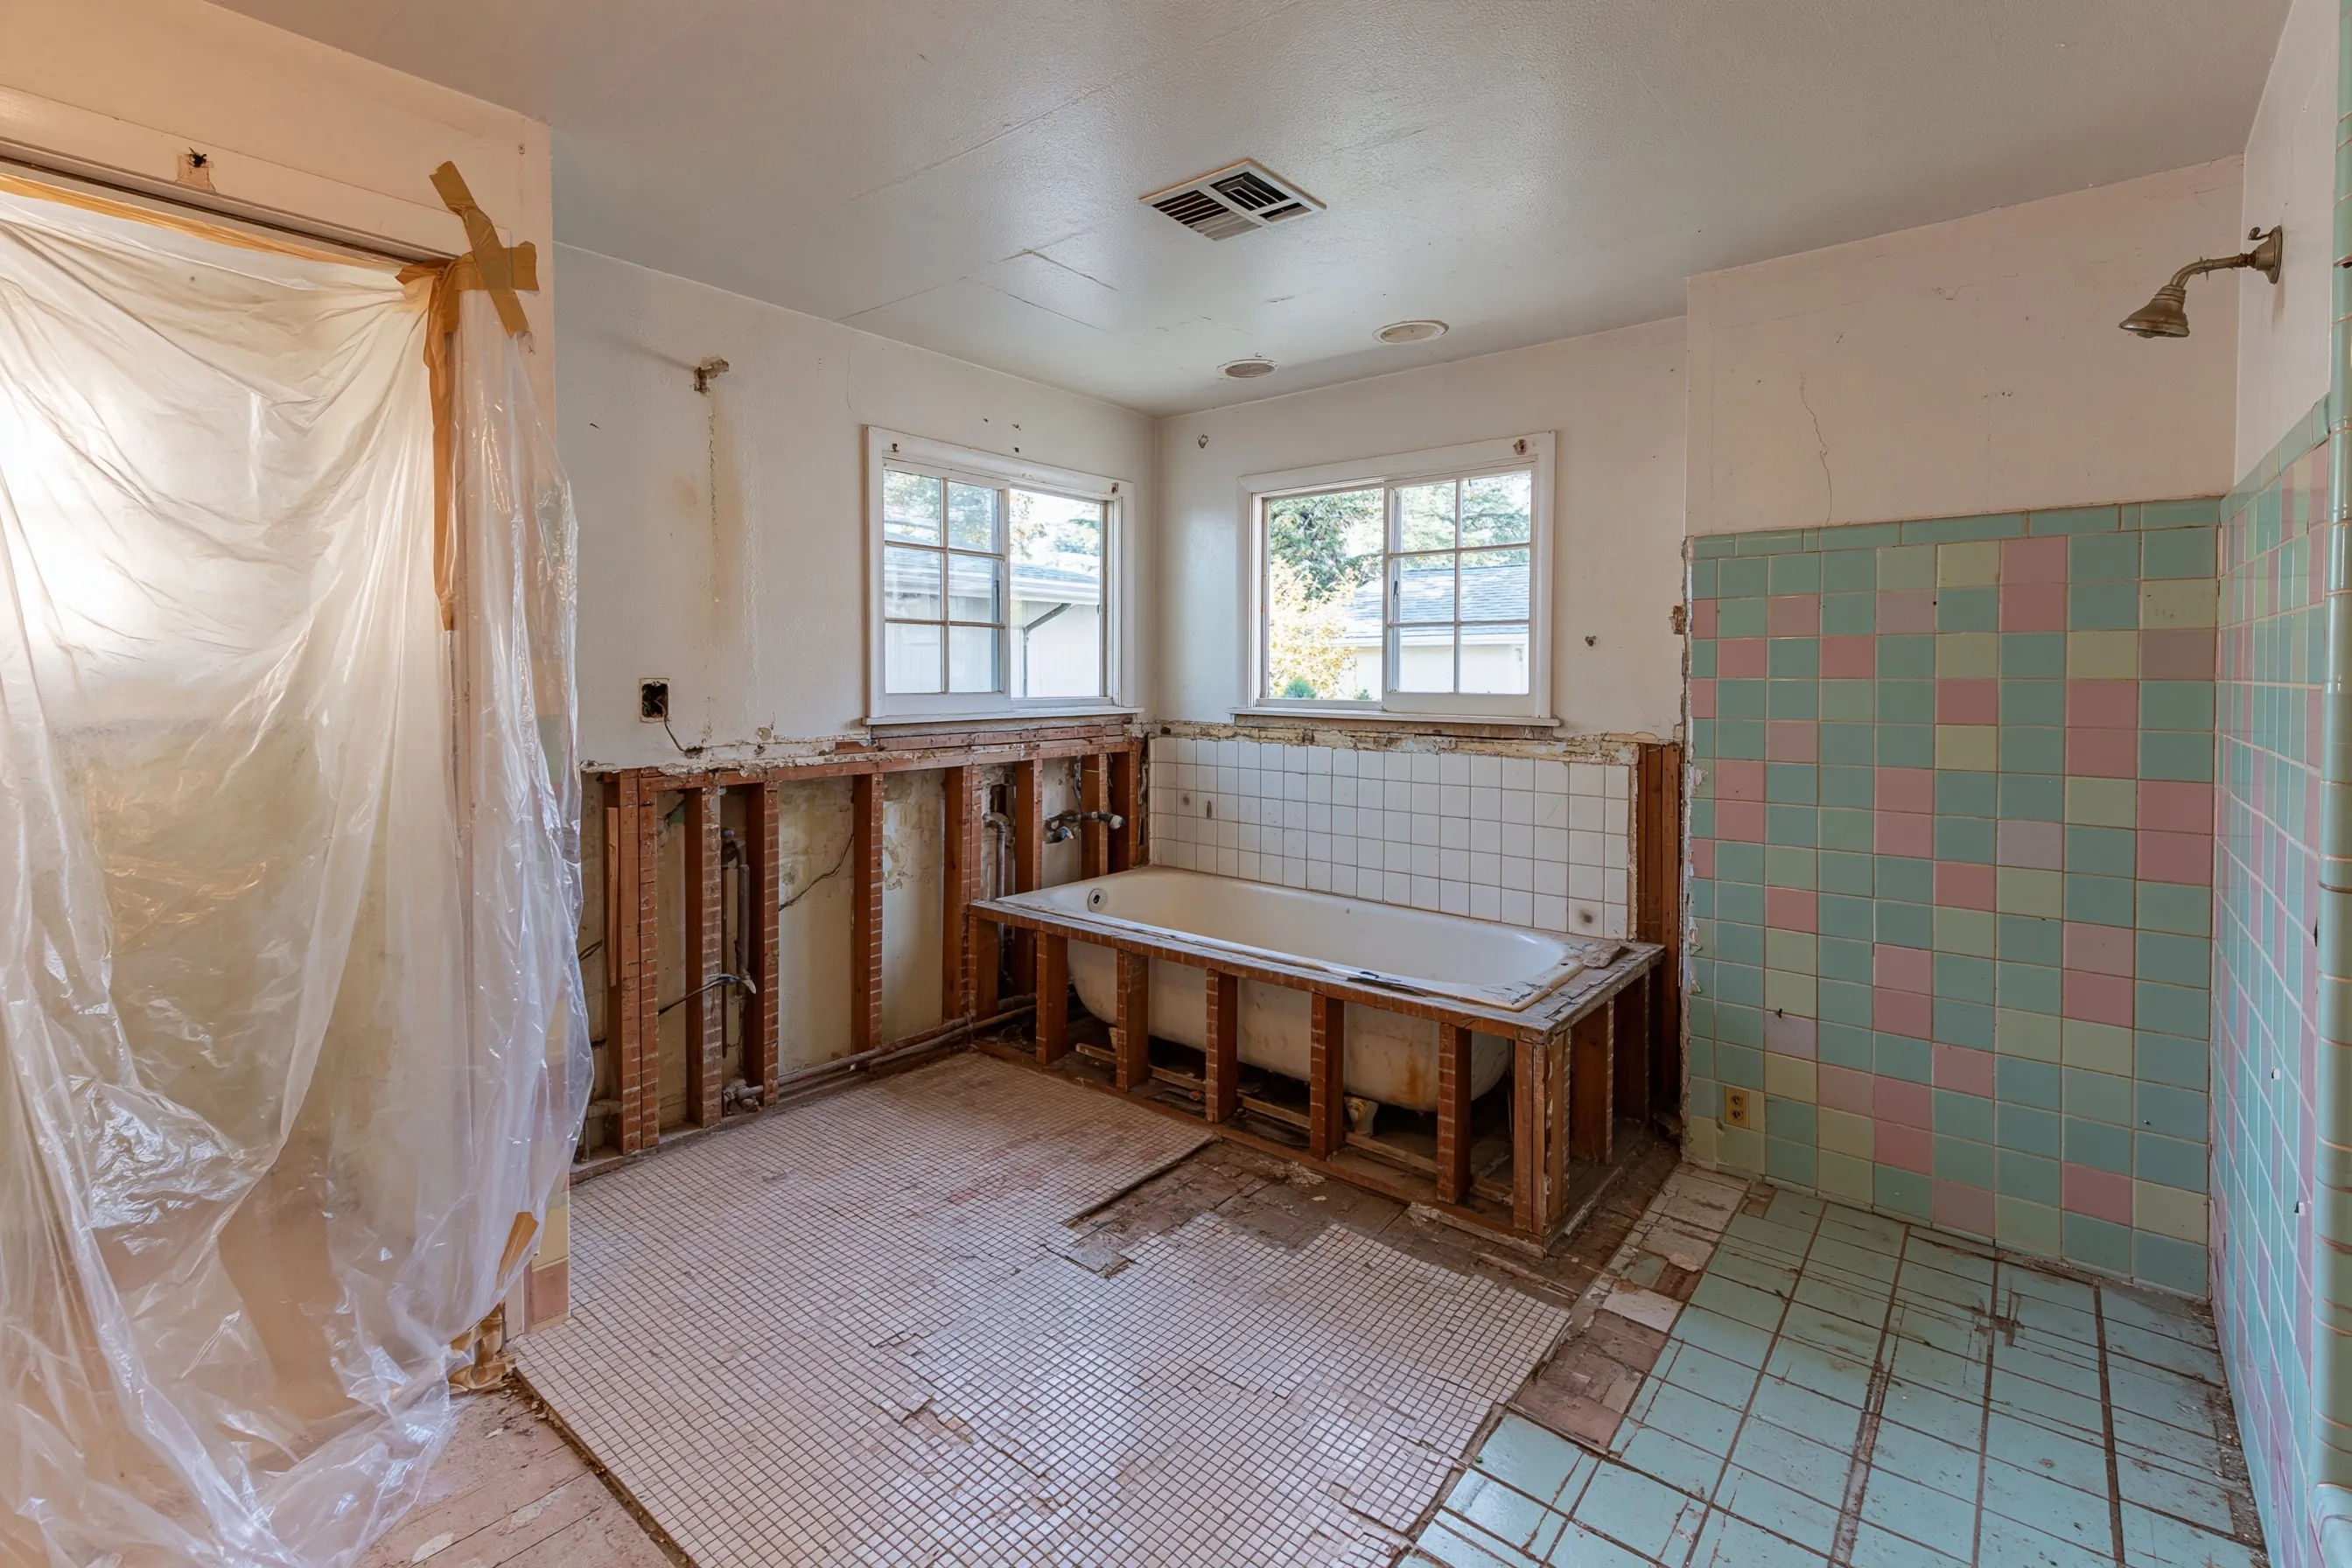
Floor tile adhesive out before a bathroom remodel that keeps the old tub

Example project

Bathroom with the walls around an old built-in tub cut back to the studs, small floor tiles partly lifted, pink and green wall tile and plastic at the doorway
Home
1950s single-story house in La Mesa
Original request
A new floor and new tub walls, keeping the old built-in tub
Testing
Lab tests of the small floor tile, the adhesive under it, the wall joint compound and the wall tile
Found
Asbestos in the black adhesive under the small floor tile
Clear
No asbestos in the floor tile itself, the joint compound or the pink and green wall tile
Work
About 45 sq ft of floor tile and adhesive removed wet, with the tub covered and protected
Timeline
One day, after the remodeler has opened the clear tub walls
Estimated cost
$2,600

Scope of work

Samples of each layer, the bathroom sealed with plastic and a filtered air unit, the tub covered, the small floor tiles lifted and the adhesive scraped off wet, sealed bags, a HEPA clean and disposal. The remodel, new walls, tile and fixtures are priced separately.

Project overview

In this example, the owners of a 1950s house in La Mesa are redoing the bathroom floor and tub walls but keeping the old built-in tub. Each layer is tested. The walls and wall tile are clear, so the remodeler has already opened the tub walls to the studs; the black adhesive under the small floor tiles is positive.

The floor comes up first, wet and inside plastic, with the tub covered so it is not chipped. A house needs no air district notice in this county, so the new floor can go down the next day.

The goal

The goal is a clean bathroom floor around a protected tub, with the asbestos adhesive gone and the remodel on time.

Process

  1. First visit Samples from each wall and floor layer go to a lab.
  2. Removal day Bathroom sealed, the tub covered and padded, floor tile and adhesive removed wet.
  3. Same day Room cleaned and checked, plastic down.
  4. Then The remodeler lays the new floor and builds the new tub walls.

Planning right

  • Old cast tubs are heavy and worth keeping. Ask for the tub to be covered, not removed.
  • Small mosaic tiles can sit on adhesive or on a mortar bed. Each is tested.
  • Tell the remodeler which layers are clear, so they can work without delay.
  • Keep the report with the remodel permit papers.

Get a free quoteMore about renovation and demolition abatement

Request a free asbestos removal quote

Tell us what you plan to change, whether it is a house, a mobile home, an apartment building or a business, and roughly when it was built. Include the address so we can check the rules that apply. We'll get back to you soon with an estimate or any questions we have. Estimates are free and there's no obligation.

Call (619) 639-0343

Call (619) 639-0343